Showing posts with label Easy. Show all posts

Wednesday, November 25, 2015

Chicken and Spinach Tikka Masala with Buttered Lemon Cauliflower 'Rice'

I am really stoked with this recipe - I'm just gonna say that right from the get-go. We eat chicken at least once a week at our house and it's hard to keep coming up with new and interesting things. I was looking for something a little bit different to the usual and came across this recipe by Nadia Lim, of MasterChef and My Food Bag fame, which I found on The Food Show website, somewhat randomly.
I was surprised to find that I had almost all the staple ingredients in my pantry already and I liked the idea of making a curry totally from scratch - I usually use a store bought paste. I'd also never had a go at the latest trend of using cauliflower for everything from pizza bases to mash to rice, so I was keen to give it a whirl. And it looked pretty healthy and quick - very important for a Sunday night dinner, after spending the better part of the day driving back from Hawke's Bay.

1 tablespoon of oil
1 large onion, thinly sliced or chopped
2 teaspoons garam masala
1 tablespoon ground cumin
1 tablespoon of smoked paprika
1 1/2 teaspoons of ground tumeric
1 teaspoon of ground chilli
2 cloves of garlic, crushed
2 teaspoons of chopped, grated or minced ginger
Zest of 1/2 a lemon
1 teaspoon of salt
600g boneless, skinless chicken things, cut into 2-3cm pieces
400g can chopped/crushed tomatoes
1 tablespoons sweet chilli sauce
Juice of 1/2 a lemon
1/2 cup sour cream or cream - I used lite sour cream
3 large handfuls of baby spinach, chopped
2-3 tablespoons of plain yoghurt (to serve)
1/4-1/2 cup chopped coriander (to serve)

For the buttered cauliflower rice:
1/2 head of cauliflower (including the stem), cut into florets - the recipe said a whole head but 1/2 head was just right for 4 servings.
1 tablespoon of butter
Zest of 1/2 lemon
1/4-1/2 cup chopped coriander or flat-leaf parsley


Heat the oil in a large frying pan on medium heat. Cook the onion for 4–5 minutes until it's just starting to turn brown. Add the spices, garlic, ginger, lemon zest and salt and cook for a further minute or two. If the onion or spices catch or stick to the bottom of the pan, just add a little bit of water to the pan and stir. Add the chicken, tomatoes, sweet chilli sauce, lemon juice and cream/sour cream, cover and simmer for 5–10 minutes until chicken is cooked through and sauce has thickened slightly. While the chicken is cooking, make the cauliflower ‘rice’. Put the cauliflower florets into a food processor and pulse until it's the texture of rice or couscous. Put into a microwave-safe bowl and microwave on high, uncovered, for 2-3 minutes to steam the cauliflower slightly and evaporate extra moisture to make it fluffy. Add the butter and coriander/parsley to the hot cauliflower and fluff, using a fork, then season to taste with salt and pepper. The chicken should be cooked by now, so just stir through the spinach until wilted and season to taste with salt and pepper. Spoon some cauliflower rice and chicken tikka masala onto each plate and garnish with a little yoghurt and coriander.

This recipe was easy and quick, I already had most of the ingredients and, most importantly, it was delicious! I really liked the cauliflower rice - a simple and healthy alternative to rice - and even my partner who doesn't like cauliflower, thought it was pretty good. I can see this becoming a regular!


Saturday, November 14, 2015

Banana Bread

Oh haaaaaay! It's been a month since I last posted but I've had a some other exciting-and-kind-of important-sort-of life-changing stuff occupying my time of late. And I've actually just been pretty busy with quite a few weekends away from home, but I have still managed to squeeze in some cooking here and there.

I was working from home the day I made this, which meant when I finished up for the day I had some time to put a banana bread in the oven. There were a couple of dire-looking bananas in the fruit bowl, which normally I chuck straight in the freezer for future use in cakes or smoothies, but I was inspired to whip something up then and there. I looked for a 'healthy' recipe for banana bread, something without as much sugar and fat and found one on BBC Good Food. I didn't quite have the right amounts of everything so I adapted it a bit to suit, and added some extras.

140g flour - wholemeal would make this even healthier, but I didn't have any.
100g self-raising flour
1 teaspoon baking soda
1 teaspoon baking powder
pinch of salt
1/4 teaspoon mixed spice
1/4 teaspoon cinnamon
2-3 ripe bananas, mashed - I think 3 is best, but I only had 2.
4 tablespoons of agave syrup - I only had honey, so I mixed about 3 tablespoons of clover honey with a little hot water, to make it more like a syrup. I used a little less as I didn't want it to be too sweet.
3 large eggs, lightly beaten
150ml of low-fat, plain yoghurt - I didn't quite have 150ml so about 50ml was some mixed berry yoghurt I also had in the fridge.
chopped pecans or walnuts (optional - and I didn't opt for these).

Pre-heat oven to 160 degrees celsius, fan bake. Put all the dry ingredients in a large bowl and line a loaf tin with baking paper - make sure you leave it coming up over the sides a bit. In a second bowl, combine the mashed bananas, agave syrup/honey, beaten eggs and yoghurt. Add to the dry ingredients and mix until just combined. Pour into the tin and sprinkle the nuts on top, if you're using them. Bake for 1 hour 10-15 minutes, until a skewer comes out clean - mine was done in just over an hour though so keep an eye on it. Cool on a wire rack and eat warm, or like the Aussies do, slice it, toast it and spread it with butter, cream cheese or even lemon curd at breakfast time. Store in an airtight container and it should last at least a few days, longer if you're toasting it.


I was a bit over the usual for breakfast and this was a bit of at treat for the rest of the week but it didn't taste overly sweet and a couple of slices with butter were surprisingly filling. It wasn't quite as banana-ry as I would've liked, so I'd use 3 bananas next time. I've recently bought an Easiyo yoghurt maker too, which is great as I use a lot of natural yoghurt, both in cooking, smoothies and just to eat, so it's nice to be able to make your own. It's also great served with any sort of sweet cake instead of cream, to take the edge off the sweetness a wee bit. Enjoy!

Sunday, October 11, 2015

Cheesy Tomato and Veggie Pasta Bake

Yay! It's Spring time! And daylight savings! I love nothing better than cooking in my kitchen when it's still light - it's so nice and bright and the lighter evenings are promises of the approaching summer. It also means time to plant a new veggie garden, which I managed to do a couple of weekends ago, including potting some herbs for my window sill.

The weekend before last we were in Brisbane for a wedding, which was lovely - and warm. A couple of days before we left I wanted to try and use up some of the veggies we had in the fridge. Plus it was a Monday, so a good reason to have a meat-free meal. This recipe is great as you can pretty much put in whatever you like/have on hand/need to use up and it's very accommodating. And if you really need meat, you can add that in too. This concoction comes straight from the mind of yours truly!

1 tablespoon oil
1/2 onion
1 stalk celery
1 zucchini
1/2 red capsicum
6 mushrooms
2 cloves garlic, crushed
1/2 teaspoon dried chilli flakes/fresh chilli
2 tablespoons tomato paste
1/2 teaspoon smoked paprika
1 tablespoon harissa paste (optional)
can chopped tomatoes
1 tablespoon balsamic vinegar or 1 teaspoon of sugar (optional)
couple of handfuls of spinach
250g pasta - I used macaroni but whatever you like is fine
50g feta cheese
parmesan cheese
handful of fresh parsley

Preheat the oven to 200 degrees celsius. Chop up the onion, celery, zucchini, capsicum and mushrooms. Heat a little oil in a pan on medium heat and, when hot, add the veggies. Cook for about 5 minutes, stirring occasionally, until the onion is starting to become clear and the veggies are softening, Add the garlic and chilli and stir, cooking for another minute or two. Add the tomato paste, smoked paprika and harissa paste and stir, cooking for another minute. I love harissa and always have a jar in the fridge - it's so versatile and gives things a real depth of flavour. I often just have it on toast with eggs and avocado, It shouldn't be too hard to find, but it's not in every supermarket. Next, add the chopped tomatoes, stir, season and simmer for about 10 minutes. At this point, get some water on to boil on the stove, with a little salt and olive oil. Add the pasta when the water is boiling. Taste the sauce and depending on what you like, you can add either the balsamic vinegar or sugar to take away from the tartness of the tomato if you need it. Drain the pasta when cooked to al dente and tip back into the empty pot, off the heat. Add the spinach to the sauce and stir to wilt the spinach, then tip the sauce into the pot with the pasta. Stir gently to combine. Crumble the feta on top and the chopped fresh parsley and give it another quick mix. Pour into a rectangle baking dish, or 4-6 small dishes. Grate over the parmesan cheese to your liking and bake in the oven for 20 minutes.


Serve with a side salad. Creamy and cheesy but fresh and tomatoey at the same time. A great dish to use up leftover veggies and get your 5+ a day at the same time - and it's perfect for leftovers the next day or feeding a few hungry people.

Sunday, September 27, 2015

South-east Asian Pot Luck Part 2 - Spicy Thai Fish Cakes with Sweet Chilli Dipping Sauce

As well as the chicken satay, I also made some spicy thai fish cakes for the recent pot luck dinner I hosted. This recipe came from Radio New Zealand of all places, but the recipe is actually one of Annabel Langbein's. I like this one because it has fresh fish and the ingredients list doesn't feature anything too wacky.

1 spring onion
1 red chilli
Zest of a lime or a lemon
2 teaspoons minced fresh ginger - or if you're a bit lazy like me, use the jar stuff
2 teaspoons fish sauce
1/4 cup coconut cream - I used coconut milk as I had it left over from the peanut sauce and whilst it still worked, I think coconut cream would have given them a slightly better texture.
1 egg white
500g boneless fresh white fish - I used cod

Put all ingredients into the food processor except the fish and blend to a fine paste. You could also use a hand blender if you don't have a processor. Add half the fish and blend again until smooth. Chop up the rest of the fish and mix it in by hand to keep the mixture a bit chunky. Make into balls around the size of walnuts and flatten into patties. The recipe said to barbeque or grill them, but I just fried them in a little oil on the stove. Cook the patties for about 2 minutes each side until they feel bouncy when you touch them and are slightly browned. I put them on some paper towels once cooked, just to soak up a bit of the excess oil. You can make these ahead of time and reheat in a hot oven for 4-5 minutes, however I think it's better to make them ahead of time, put them in the fridge and then cook them fresh right before you're ready to eat them. Serve with a sweet chilli dipping sauce, simply made by combining the following:


1/4 cup sweet chilli sauce
1 tablespoon fish sauce
Juice of 1 lime - or lime juice if the real thing is too pricey
2 tablespoons of chopped coriander

These fish cakes are really fresh tasting with the fish, coconut ginger and lime flavours. Not blending all the fish also gives them a great texture.

I'm pretty lucky to have some awesome friends who also happen to be excellent cooks and always made an effort for these sort of nights. Check out the spread below!


Thursday, September 24, 2015

South-east Asian Pot Luck Part 1 - Chicken Satay with Peanut Sauce

I've mentioned in a previous post that some girlfriends and I like to get together every few months and have a pot luck dinner. We choose a different type of cuisine each time, and it almost certainly involves a lot of wine, as well as an amazing array of food. I hosted at my place this time and even though we did a Japanese theme last time, we settled on south-east Asian this time. I decided to make a couple of things suitable for entrees/pre-dinner snacking - chicken satay with peanut sauce and spicy thai fish cakes with a sweet chilli dipping sauce.

I did a bit of digging around the interwebs before I found some recipes I was happy with. Serious Eats yielded the recipe for the chicken satay and the peanut sauce was courtesy of the Nigella website. I'll tell you all about the spicy thai fish cakes in part two. 

For the chicken satay you need:

1 stalk lemongrass, roughly chopped - or use pre-prepared from the jar, like I did, if you can't get it fresh.
2 tablespoons vegetable oil - I use canola
2 tablespoons fish sauce
2 tablespoons brown sugar
1 tablespoon of lime juice - fresh is ideal if limes aren't crazy expensive
1 tablespoon of soy sauce
2 medium cloves of garlic
1 teaspoon ground tumeric
1 teaspoon ground coriander
1 teaspoon Sriracha (or another hot chilli sauce)
About 450g of boneless chicken breast - you could also use thigh
Bamboo skewers (this made about 15)

Put everything but the chicken (and skewers, duh) into the blender and whiz on high speed until smooth. Slice the chicken into strips lengthwise, about 1/2 an inch thick. Put the chicken into a large resealable plastic bag, pour the marinade in and give it a squish around. Leave it in the fridge to marinade for at least 1-2 hours, but the longer the better. While the chicken is marinading, soak the skewers in water so they don't burn under the grill. Once the chicken has marinaded, thread the chicken onto the skewers and place on a baking tray, either non-stick, greased, or lined with foil. Grill under a high heat - but not too close to the element. They will take around 15-20 mins to cook, and make sure you turn them half way through. Don't overcook them - the problem with using chicken breast is that it can dry out. You can make the peanut sauce ahead of time, while the chicken is marinading, and reheat later if you like, as I did, but I think it's best fresh.


1 can coconut milk
2 tablespoons crunchy peanut butter
1 teaspoon soy sauce
1 tablespoon brown sugar
1 teaspoon dried chilli flakes
1 small red chilli, finely chopped - leave out one or both types of chilli if you'd rather have it milder
1 small onion, finely chopped - I used a shallot
1 clove garlic, crushed
1/2 tablespoon of peanut oil - I just used regular canola oil

Heat the oil in a pan and fry the garlic, onion and chilli over a medium heat until the onion is soft - but don't let it brown. Add the sugar and stir until slightly caramelised. Add the soy sauce and peanut butter and stir through. Add a little coconut milk at a time until you get the consistency you want.

These are really tasty - a great depth of flavour from the marinade with a hint of spice, and with the creamy nuttiness of the peanut sauce, they make a great snack at a party or entree before a main meal.

Next time - spicy thai fish cakes with a sweet chilli dipping sauce!


Sunday, September 13, 2015

Slow Cooker Greek Lamb

As promised (albiet a little while ago), here's something yummy and easy peasy for the slow cooker - and coming into Spring, it's actually pretty perfect. Last weekend, we were pretty lucky to have a beautiful sunny weekend here in Wellington, so it's starting to feel like winter might finally be over. Which also means I probably won't be using my slow cooker quite as much any more, so best to get in a few final meals. I put this on last Sunday morning, before heading out to a baby shower and to visit some other friends, and it was lovely to come home to the house smelling like a good roast - with hardly any effort.

Sometimes I struggle to find interesting things, beyond the standard stews and the like, to make in the slow cooker - if you know any good links, please let me know. This recipe is courtesy of www.kidspot.co.nz, a good website for kid-friendly recipes but also if you're not very experienced in the kitchen. I've found a few good, simple recipes on there - even one or two my partner was willing to have a go at!


3 tablespoons olive oil
1kg rolled lamb loin - I actually used a bone-in roast, because it was about half the price of a rolled and stuffed lamb loin, so this is ok too. Mine was about 1.2kgs.
1kg potatoes
1 bunch rosemary
1 head garlic
1/2 cup dry white wine
1/2 cup lemon juice


Peel and cut the potatoes into eighths. Place these at the bottom of the slow cooker and put 2 sprigs of rosemary on top. Peel 6 cloves of garlic and slice. I had some large home grown bulbs a friend gave me which have a really strong flavour, so I used 4. Poke holes in the skin of the lamb with the point of a knife and push the garlic into the holes. Heat the oil in a pan on the stove and brown the lamb all over. Place the lamb on top of the potatoes in the slow cooker and push sprigs of rosemary into the holes you put the garlic into earlier. I had some leftover sliced garlic so I put that into the slow cooker too. You can also put your squeezed lemons in there as well. Pour over the wine and lemon juice and cook on low for 6 hours or high for 3 hours - a little less if you like your meat rarer.


The meat was lovely and tender and the potatoes were really soft. I took them out of the slow cooker and fried them, to make them a wee bit crispy.I didn't need to use any extra oil either, as they had some of the fat from the meat on them. Be warned though - the potatoes can have a little bit of a tart flavour from the lemon and wine, which didn't bother me but my partner thought the flavour was a bit too strong. If you didn't want to fry them, you could always roughly mash them with some feta cheese, fresh parsley and cracked pepper. I served the lamb with mint sauce but there was leftover liquid in the bottom of the slow cooker that could've made a nice gravy if I hadn't been feeling so lazy (or hungry). And there's always leftovers for sandwiches - which I'm sure everyone agrees is pretty much the best part about a Sunday roast.

Tuesday, August 25, 2015

Chicken and Udon Noodle Soup

It's been pretty cold lately, in case you hadn't noticed, or you're reading this from warmer climes. And I've been feeling it more than most over the last month after returning from northern hemisphere summertime humidity straight back into the depths of winter. Like many of us, I've been in hibernation mode of late as well as a little depressed to be back at work if I'm honest, not to mention sick too. Feel sorry for me, god damn it! But the upside to all this is comfort food, but also lots of quick and healthy meals that don't take too much effort after a long day of work.

In commiserations of the cold winter weather, here's a super quick and warming meal - and you probably can't get any easier than this as there's hardly any cooking! And if, like me, you use leftover chicken from a whole cooked chicken you bought on a Saturday from the supermarket, it's basically just assembling it. Give it a whirl on a week night when you're tired, but need something hot and nourishing.

This recipe is from the August issue of the Healthy Food Guide, which fortuitously arrived not long after I got home. It serves four - or two and lunch the next day.

2 cups chicken stock
2 teaspoons of crushed garlic
1 chilli, finely sliced (or dried chilli flakes, which I used as fresh chillis were crazy expensive)
2 x 200g packets of fresh - as in, not dried but still found on the supermarket shelf - udon noodles (you could also use dried rice vermicelli noodles too, but you'd need to cook them for a bit longer)
450g bag of coleslaw (either a pre-made bag from the supermarket, or make your own, depending on how energetic you're feeling)
1 bunch baby bok choy (spinach would also work, but bok choy has a great flavour for this sort of dish)
2 cups shredded cooked chicken breast
1/2 cup coriander leaves


Put 2 cups of water onto heat and add the chicken stock, garlic, chilli and noodles when it's boiling. Simmer for 1 minute to soften the noodles, longer if they're dried). I recommend warming the bowls before the next step. Put the coleslaw, bok choy and chicken in four bowls and then divide the noodles between the bowls. Ladle the broth over the top and cover for a few minutes to allow the chicken and veggies to heat through - the veggies will be best when they are still a bit crunchy. Garnish with coriander and extra chilli if you like. The flavours are all spicy and fresh and it's just so perfect for a cold winter night. If you're making it for two with leftovers for lunch the next day, just make the full amount of stock liquid and take that to work with the chicken and veggies in a separate container. Just microwave the stock and noodles the next day, add the chicken and veggies, cover and warm through. Next time I might add baby corn - so good in Asian dishes. It's a little hard to eat on your lap though - I don't know about you guys but we've abandoned eating at the table in the dining room for the warmth of the living room. 


The last couple of weeks I've been Wellington on a Plate-ing it up like a mo' fo' - so next time, I'll tell you all about that. And share something good for the slow cooker - perhaps the most valuable kitchen implement for lazy winter time cooking.

Thursday, June 11, 2015

Macaroni Cheese

This recipe is the BOMB. If you need some winter comfort food, look no further than this creamy, cheesy, carby bad boy. For my birthday I was given two cookbooks, one of which was The Great New Zealand Cookbook. Having a flick through, I came across this recipe for macaroni cheese. This is something I've never actually made before and hadn't eaten in ages, so I thought I'd give it a try. This recipe is by Laurent Loudeac of Hippopotamus,one of the fanciest restaurants in Wellington. It made 5-6 portions for us, although the recipe says 4 but it's definitely quite rich - there's a lot of cheese in there - so smaller portions were fine for us on this particular evening.

250g macaroni
100g butter
100g plain flour
500ml milk
100g blue cheese, crumbled
100g ham, chopped - this is optional and you could easily leave it out and make it vegetarian. I used chorizo sausage, as I had some handy.
50-100g spinach
1/4 cauliflower - this wasn't in the recipe, but I had some leftover from the veggie curry
75g cheese (cheddar or Gruyere), grated - the recipe actually says 200g but I found 75g was just fine.

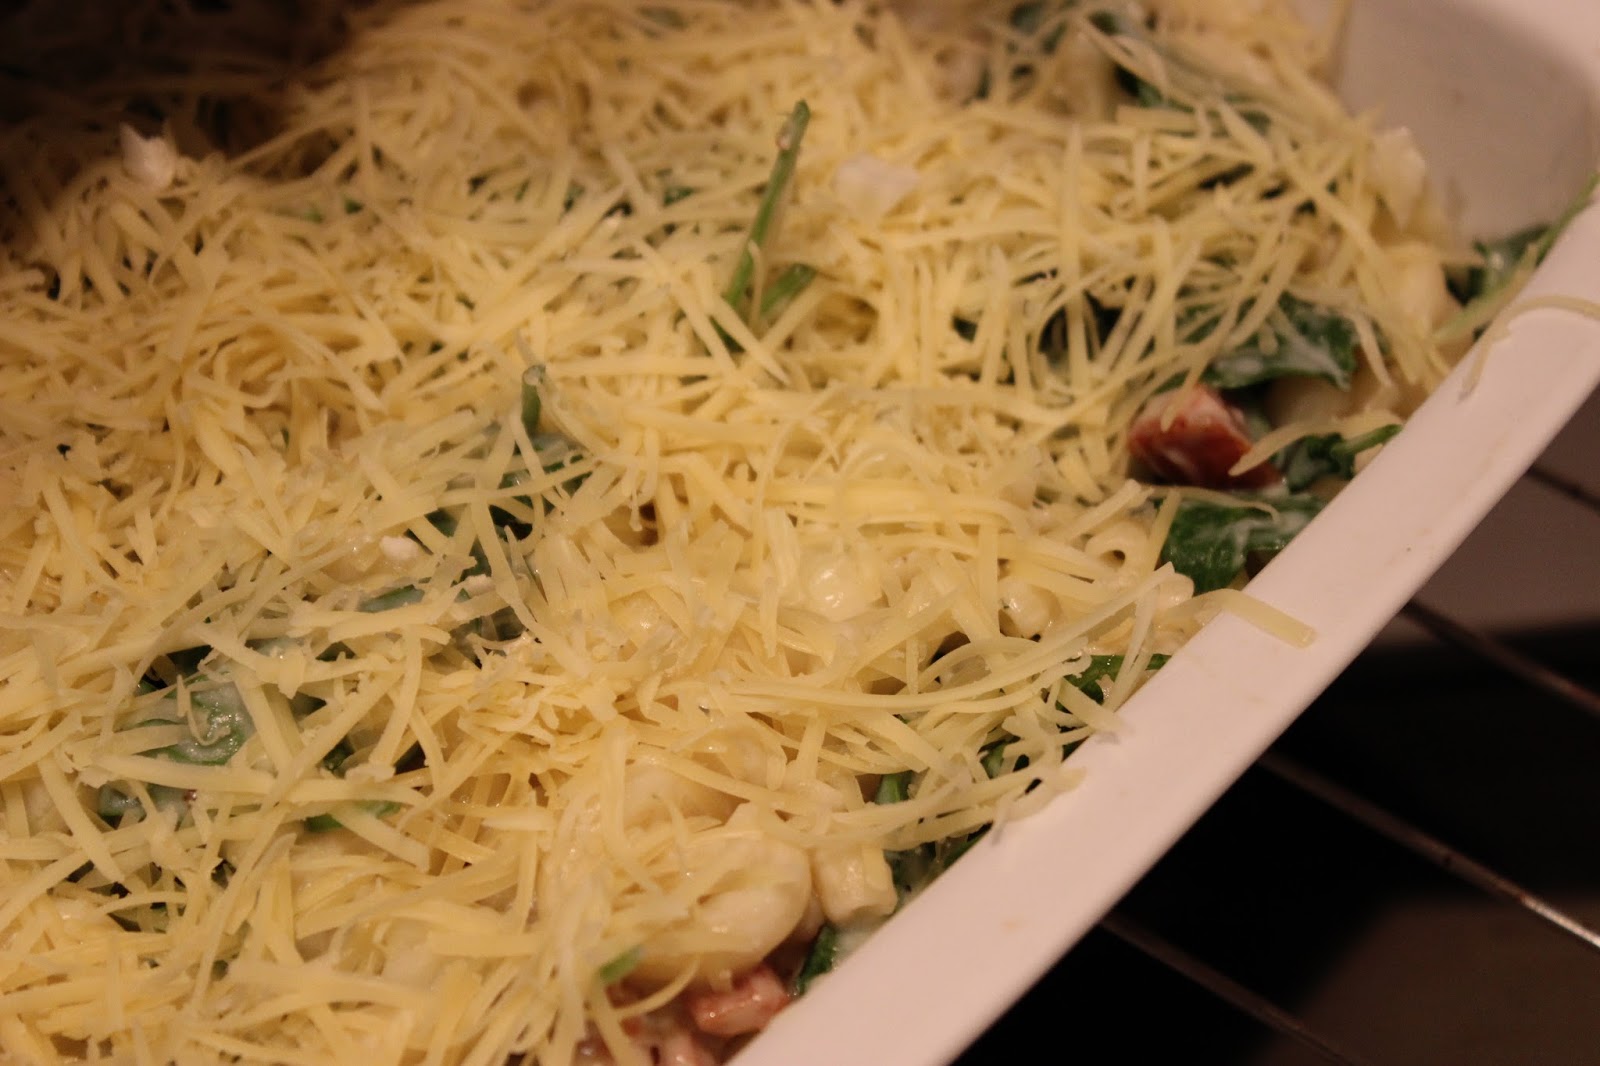
Pre-heat the oven to 180 degrees celsius. Cook the macaroni in a large pot of salted boiling water until al dente - usually about 6 minutes. While the pasta is cooking, melt the butter in a small pot and add the flour, stirring until you get a paste (roux). Add the milk slowly, whisking as you go to break up any lumps. Cook until you have a nice thick white sauce (bechamel). This took me a little while and a lot of stirring to get the sauce to thicken, but without it sticking to the bottom of the pot. Season to taste and then add the blue cheese, ham - or in this case, chorizo - and spinach. I also added the cauliflower at this point. I love to add extra veggies to dishes where I can, and spinach is a good one, so I always use extra. It adds a nice bit of colour to this dish too. Drain the pasta and pour the sauce over it, in the large pot. Stir well to combine and poor into either a large oven proof dish, or small individual dishes. Sprinkle the grated cheese over the top and bake for 25-30 minutes or until it's golden and crispy on top - I put the grill on for the last few minutes of cooking, just to get a really nice crust. Serve with a salad on the side - which I didn't this time, but I'd recommend it just to cut through the richness of all that cheese. Yum!


Tuesday, June 2, 2015

Veggie Curry with Chickpeas

I have recently rediscovered the library and I had a brainwave when I was there recently - I can get cook books out from the library! My first selection was Jamie Oliver's 30 minute meals. I've made a few recipes from here before - some of them are conveniently found on the internet - and this one is probably my favourite. I've made it heaps of times over the last few years - it's easy, has loads of veggies and you can actually make it in 30 minutes...without all the other accompaniments that go with this recipe in the book, that is. It's actually called Curry Rogan Josh in the book, but you can make it any kind of curry, just choose whichever kind of paste you like.

I also made the Piri Piri Chicken and the Kind Of Sausage Cassoulet while I had this book out from the library. I didn't rate the sausage cassoulet - it was too oniony for my taste - but the piri piri chicken was really delicious, as were the lemony potatoes with feta, chilli and coriander that went with it. I forgot to take any photos when I made it however, so no blog about it....this time. Anyway, back to the curry. I usually make some adjustments to the amounts of some things in the recipe, so this is my slightly altered version, which should do two meals and two lunches the next day.

1 onion
1/2 medium butternut squash
1/2 small cauliflower
1 fresh red chilli (optional)
2 cloves of garlic (3 if they're small)
a bunch of coriander
1/4 of a 283g jar of Patak's curry paste. I usually go for korma, but this time they only had 'mild curry paste' at the supermarket
1 x 400g can of chickpeas
100g prewashed baby spinach
1 cup (ish) natural yoghurt
oil for cooking

Peel and slice the onion and put into a large pan or pot with some oil and a splash of water, on a medium heat. Use the neck half of the butternut squash, so you don't have to de-seed it. Chop it up into 1cm pieces, skin and all, and add it to the pan. The skin becomes really tender so you won't even notice it, and it saves having to chop the skin off which is really fiddly. Chop up the cauliflower into bite-sized pieces and add to the pan, along with the sliced fresh chilli. I really like cauliflower in curries as it's such a great texture with excellent absorption qualities - so add a bit more if you fancy it. Crush in the garlic and chop up about half the bunch of coriander, including the stalks, and add to the pan. Add in a couple of splashes of water, the curry paste and the can of chickpeas, including the juices. Season, stir well, put the lid on and turn the heat up to medium-high. Basically, just cook this (hard and fast, as Jamie says) for about 20 minutes, stirring occasionally, and adding more water if it starts to look a bit dry. Add the spinach about 5 minutes before the end and stir through. Cook the rice while the curry is cooking (see below). When it's all done, divide the rice and curry between plates and add about 1/4 cup of yoghurt onto the top of each, with some chopped coriander leaves.


As as little aside, I am rubbish at cooking rice, however I learnt the best and most simple way from this recipe. Fill a mug with rice, put it into a pot and then add two mugs of boiling water with a little olive oil, a pinch of salt and a few cloves if you have them. Put the lid on and cook on a medium heat for 7 minutes. Then take the pot off the heat and leave it, with the lid on, for another 7 minutes - this gets you nice and fluffy rice and (almost) never fails!

Friday, May 29, 2015

One-cup Pancakes

It was Mother's Day recently and instead of a pressie, I thought I'd invite Mum over to have brunch with me and just hang out. I offered her a 'menu' a few days before, with several choices, and she chose pancakes. Now I know this isn't a super fancy thing to make, and most people can probably pretty easily whip up pancakes, but this one is uber easy - and you probably have everything in your cupboard already. This recipe is another Jamie Oliver one, but I chose it because it's the simplest of simple recipes. It was a lovely sunny day, so making these in my kitchen on a Sunday morning for my mum was really nice.

1 large free-range egg (I used 2 smaller ones)
1 cup of self-raising flour
1 cup of milk
sea salt
1 tablespoon of oil

And whatever you want to put on your pancakes! I chose:
1/2 cup of frozen mixed berries
6 tablespoons of plain yoghurt
2 teaspoons of runny honey
1 teaspoon cinnamon

Crack the egg(s) into a large mixing bowl. Add in the flour, milk and a pinch of sea salt. Whisk it all together until it's a nice smooth batter. If you wanted to put anything in the pancakes, like blueberries, you would fold these in at this point. Put a large frying pan on a medium heat and add half the oil to the pan. Make sure the oil covers the whole pan - I usually use a pastry brush or a paper towel. Add large spoonfuls of the batter to the pan, with space between each pancake to allow them room to spread out. Cook them for 1-2 minutes or until bubbles appear on the surface, and then flip them over for another couple of minutes on the other side. You need to cook them in batches, so once they are cooked, I put them on a plate in the oven on a low heat so they keep warm. Use the rest of the oil between batches if you need to.

For the accompaniments, I put the frozen berries in the microwave for about 20 seconds and then blitzed them a little with a hand blender, but not so much that they were completely puréed and smooth. I divided the pancakes between two plates, in piles, and topped with the plain yoghurt, berry sauce, drizzled the honey over and sprinkled a little cinnamon on the top.

We washed our pancakes down with some mimosas (a fancy way of saying bubbly with orange juice), even though I was a little hungover. It was a really nice way to treat my mum, but with something homemade we could enjoy together.. I'm lucky that I live in the same city as my mum, so I see her fairly regularly, but that hasn't always been the case - I spent the better part of nine years living overseas and despite the fact that I've been living back home for over two years now, she still tells me how happy she is to be able to spend time with me. I am sure everyone says this about their mum, but mine is pretty special, so it was a pleasure to make these, and enjoy them with her. Love you Mum!


Friday, May 15, 2015

Tomato and Chilli Chutney

I had quite a few green chillis on my plant in the garden recently and I was really hoping they would ripen at the same time so I could make some chilli chutney or relish. But they didn't - they ripened frustratingly slowly, one by one. Not helped by our cat pulling a couple off the plant before they were ready, bringing them inside and giving them a good chew. I did however pay a visit to my aunt in Martinborough - who supplied the olive oil used for the pesto a few weeks back - and she gave me an abundance of chillis from her garden. Back on track.

I love a good chutney, especially with cheese and crackers or in sandwiches, and this recipe was so easy. It was from BBC Good Food, which is another of my go-to websites. It was submitted by a reader, so I was a tiny bit sceptical, but it had some positive comments and seemed super easy so I thought I'd give it a go. I made a half batch, because I don't have a really big pot at the moment, so that's the quantities I've listed below. It made one and a half medium jars and one small jar, which was plenty for just two of us. Just double everything if you want more.

Tomato and Chilli Chutney

250g red onion, roughly chopped
500g tomatoes, roughly chopped
3 garlic cloves -  4 if you're doubling this recipe - roughly chopped or crushed
4-6 chillis, roughly chopped - I used 4 and it's a bit on the spicy side, so I'd recommend less if you don't like it too spicy, or removing the seeds
A thumb-sized piece of ginger, peeled and chopped
125g brown sugar
75ml red wine vinegar
5 cardamom seeds - I had ground cardamom in my pantry, so I used about 1/4 teaspoon of that instead
1/4 tablespoon of paprika - add a little more if you like the smoky flavour, like I do

Put all your ingredients into a pot and bring to a gentle simmer, stirring occasionally. If you're making a half recipe, like I did, you might need to add a splash of water as well - but not too much as the tomatoes have a lot of water in them. Simmer on a low heat for one hour, without a lid on. Use a hand blender to blend the ingredients, but just a little as you don't want to purée it - it should still be chunky. Bring it to a gentle boil again, and boil until it looks shiny, thick and sticky. This should only take a few minutes. Spoon into sterilized jars. I had no idea how to sterilize jars because this is the first time I've made anything that goes in jars, so I just boiled some water in a pot and put the jars in for a few minutes and took them out with tongs. Turns out the same website this recipe is from, has some handy instructions here if you need them though. Refrigerate in the jars overnight. The recipe says it will keep for 6 weeks.

Nice and spicy and sticky and excellent with cheese. I'll definitely make this again now I know it's good - and I'd make the full recipe as a few extra jars would make great gifts. I even made some cute labels, and gave the small jar to our upstairs neighbours.


Wednesday, March 11, 2015

Mini Breakfast Frittatas

I don't know about you guys but I struggle to find interesting stuff for breakfast during the week. I don't usually eat breakfast until I'm at work at about 9am and I can only do smoothies and yoghurt with fruit for so long. I love eggs and sometimes a savoury fix is what I need. These mini frittatas (sticking with the mini theme here) are great as you can make them ahead of time, which saves time in the morning. And they are a good protein source - if that's important to you.

I just made this recipe up and the good thing is, you can basically just add what you want. It's a good way to get rid of the ends of veggies in the fridge. This recipe makes six, which is three breakfasts for me - just multiply the recipe if you want to make more.

What do I need?

4-5 eggs (depending on size)
5-ish tspns milk (about one per egg - you could also use water or a combo of both). I say 'ish' because you might find you need a wee bit more when you fill up your muffin trays.
1/4 red onion
1 garlic clove (or a teaspoon of crushed garlic, if you still haven't got any fresh stuff, like me)
Veggies - whatever you like and/or have in your fridge. I used a combination of a handful of chopped spinach and kale (as I had these in my garden), 1/4 courgette, 1/4 red capsicum and a wee bit of grated carrot as I had some leftover from the wraps I made for dinner.
Herbs. Again, choose whatever you like. I am a BIG fan of dill with eggs. This time I used a combo of parsley, dill and chives because I had them all growing fresh in the garden (did I mention my garden?). Dried is also ok too.
Cheese. Again, use what you like. For these I used feta, but I've previously used parmesan or just good ol' cheddar. Finely grate it you're using cheddar or parmesan, and you only need a wee bit to top each frittata.
Optional: a little grated lemon zest, a sprinkle of dried or fresh chilli and 50g-ish of ham if you have it/are so inclined (I wasn't this time)
Oil for cooking (I usually use canola)
Salt and pepper


How do I make it?

Preheat the oven to 200 degrees celsius. Chop all the veggies up pretty small and fry with a little oil (and the chilli if you're using it) for about 5-10 minutes, until cooked. I stir them pretty continuously so they don't brown or burn. Once cooked, set aside. In a jug, beat the eggs, milk/water, chopped herbs, grated lemon zest (if you're using this - and I recommend it), salt and pepper to taste - if you're using ham, don't add too much salt as ham can be pretty salty. Grab a six hole muffin tin (I don't think that's what you call it, but hey) and grease lightly with a little oil on a paper towel or pastry brush. Distribute the egg mixture between the six holes (!). It should fill each one up about half way - adjust with a bit more milk/water if you need to. Then add the veggies, distributing them between the six holes, add the chopped up ham if you're using it at this point too and top with a little cheese of your choice. Bake in the oven for about 15 minutes or until the egg is set. Cool on a plate and voilà - three days of breakfasts! Store in a container in the fridge. I usually wrap two up in a piece of foil and when I get to work, pop them on a plate in the microwave for 1 - 1 min 30 and Robert's your father's brother!

Saturday, February 28, 2015

Mini Plum Crumbles

This dessert would make a great follow up to the smokey bbq pulled pork from my last post. It's pretty simple - you might already have most of the stuff at home, like I did - and it's pretty quick to make too.

Why did I make it? I was given some beautiful plums by some friends when I was visiting the Hawke's Bay a couple of weekends back. They were starting to go a bit soft and I didn't want to waste their deliciousness.
Where did this recipe come from? From my head - a bit of conglomeration of all the crumble recipes I've ever used.
What's it good for? When you've got an excess of fruit, when you want a warming dessert or just because it's delicious - I like to add just a wee bit of sugar when I stew the fruit so it's still a bit tart, which goes beautifully with the sweet crumble topping.
How many people can eat it? This recipe made two mini crumbles, but just multiply it for more
What do I serve it with? Ice-cream, cream, yoghurt....whatever you fancy really. I served it with plain, unsweetened yoghurt with a little sprinkle of cinnamon on top. I find that I need something to counteract the sweetness, so I'm a big fan of yoghurt with rich desserts.

What do I need?
It's important to stay hydrated while cooking

300g plums (stones removed, cut roughly into quarters) or any fruit you choose like peaches, cherries, apples etc
1 tsp caster sugar
10g butter
20g brown sugar
40g rolled oats
2 tblsp flour
1 tsp mixed spice
1/2 tsp of cinnamon


How do I make it?

Preheat the over to 180 degrees celsius. Pop the plums into a small saucepan. You might need to add a little bit of water, but my plums were pretty juicy so I didn't bother. Sprinkle the sugar over the fruit and gently simmer on a low heat until the fruit is tender. You might want to adjust the amount of sugar to your taste or to the type of fruit you're using, While the plums are doing their thing, make the crumble. Cut the butter into small pieces (it's easier if it's at room temperature at this point) and put into a bowl with the brown sugar, rolled oats, mixed spice and cinnamon. Use your fingers to rub the mix together until it looks like something that vaguely resembles breadcrumbs. At this point, I found my mix was a bit too melty-buttery (wasn't really complaining), so I added some flour. I could have used more than 2 tablespoons, but just use your judgement based on how the mixture looks.
Your fruit should be done by now. Mash it up a bit if it needs it and then spoon it into ramekins. Top with the crumble mixture and bake for about 15 minutes or until the crumble is bubbling and the top is a wee bit brown. Enjoy - but don't burn your tongue like I did!

Monday, February 23, 2015

Smokey BBQ Pulled Pork

Woo hoo, my very first recipe blog. And what better way to start than with MEAT!

Why did I make it? I made pulled pork a while back in the slow cooker, and it turned out...ok. It wasn't quite as flavoursome as I'd hoped, but that was probably because it was a 'healthy' recipe. I also had everything I needed to make it from this recipe, except the bbq sauce and pork (so yeah, the main ingredients). Also, pulled pork is just awesome and this recipe is nice and simple.
Where did this recipe come from? From one of those free recipe cards you get at the supermarket - so housewifey
What's it good for? Feeding lots of people or just at the weekend when you've got some time to wait for dinner to cook.
How many people can eat it? This recipe made 6 serves (a dinner and two lunches for two people)
What do I serve it with? I made a coleslaw with red and green cabbage, spring onions, coriander (super quick in the food processor) and chipotle aioli, and put it into some nice fresh bread rolls.


What do I need?

3/4 cup BBQ sauce. I used Wattie's Bit on the Side Smokey BBQ sauce because the people who wrote the recipe card get paid to put that in the recipe I guess, but I reckon you could use any sauce, but in my opinion, make sure it's a smokey one
1/4 cup cider vinegar
1 tbsp worcestershire sauce
1 tsp mustard. I used wholegrain
1 tsp dried thyme. I used fresh as I had some in my garden
1.2 kg boneless pork shoulder, rind removed and fat trimmed. y piece was just over 2 kgs and it had a bone, but it was all good - I just adjusted the cooking time.
1 onion chopped (I used a red onion, just because I pretty much always do.
4 cloves of garlic crushed. I used already-crushed-in-a-jar garlic because my garlic disintegrated into a cloud of dust when I went to crush it.

How do I make it?

Preheat the oven to 160 degrees celsius. Mix the bbq sauce, cider vinegar, worcestershire sauce, mustard and thyme in a bowl. Put the onion, garlic and pork in a casserole dish. Pour over the sauce, cover and out in the over for 2 1/2 hours or until the pork is really tender. I cooked it for 3 hours, as it was a bit bigger and had a bone in it. I turned the pork once half way through cooking and poured some of the sauce back over it.

Once cooked, take it out and shred it with two forks. Put it back in the casserole dish with the sauce and stir it up. Serve it with coleslaw in bread rolls. Nom nom nom!

Tip: If you're making coleslaw, make it as you need it, or make it without the aioli and add that as you need it.