Showing posts with label Weekend food. Show all posts

Sunday, January 17, 2016

Choc Berry Brownies

We're about to move house. We are having our first baby in May (woah!) and we need somewhere more baby appropriate - no steps, a dishwasher, a more accessible outdoor area etc. We found a new place much quicker than anticipated, which is great but I am definitely going to miss our current place. This has been our first flat together and we've been here for over a year, so it's home. I am sure our next place will be even better, but I'm sentimental. I have really enjoyed cooking in the lovely, sunny kitchen, so I thought it was fitting on our final Sunday here to spend some time doing one of my favourite things. I'm also trying to use up all the leftover bits and bobs we have in the fridge and freezer to make the move that little bit easier. Hence my choice for today - Choc Berry Brownies.

A friend gifted me some lovely 72% Lindt dark chocolate from a recent trip to Europe and whilst I love dark chocolate, I found this a little too intense for just eating so what better opportunity than to use it for a brownie. I also have a lot of frozen berries that I haven't been eating because of the hepatitis A berry recall, even though the brand I have hasn't been affected I avoided them just in case. But cooking the shit out of them should kill any bugs, so it's a good way to use them up.

This recipe is a 'healthy' one from the Healthy Food website. It's a little bit better for you as some of the sugar has been replaced with banana and some of the chocolate with cocoa powder - although I didn't have quite enough cocoa so used more chocolate after all. It uses low-fat spread instead of butter and trim milk, but you could just as easily use butter and whole milk if you prefer - it would make it a bit more like a traditional brownie, this one has more of a cake texture.

Oil
80g reduced-fat spread, melted
1/2 cup packed soft brown sugar
2 eggs
1/2 cup trim milk - I used whole milk.
1 ripe banana, mashed
1/3 cup cocoa powder - I didn't have quite enough so added extra chocolate and a little extra flour.
3/4 cup flour
1/2 cup self-raising flour
50g dark chocolate, chopped - I used about 75g
150g frozen mixed berries
2 teaspoons of icing sugar or icing sugar/cocoa mix to dust.

Preheat over to 180 degrees celsius. Grease a 20cm, square cake tin with a little oil and line with baking paper. Beat spread and sugar with a wooden spoon. Add eggs and beat to combine. Fold milk, banana, cocoa and flours into the mixture until just combined. Fold chocolate and berries into the brownie mixture. Spoon the mixture into the tin and bake for 20-25 minutes or until firm to the touch. Leave cooked mixture to stand in the tin for 10 minutes before removing and slicing into squares. Dust with icing sugar or a mix of icing sugar and cocoa.

I used a slightly smaller, round cake tin which meant my mixture was higher in the tin than it would've been in a larger, square tin. I found I had to cook it for about 40 minutes for it to be cooked through. It definitely needed all the cocoa, despite my extra added chocolate, so it wasn't quite as dark or rich as I would've liked. It was nice and soft and moist though and the banana helped with both this and the sweetness. Perhaps not a legit brownie, but yummy all the same.


Saturday, November 14, 2015

Banana Bread

Oh haaaaaay! It's been a month since I last posted but I've had a some other exciting-and-kind-of important-sort-of life-changing stuff occupying my time of late. And I've actually just been pretty busy with quite a few weekends away from home, but I have still managed to squeeze in some cooking here and there.

I was working from home the day I made this, which meant when I finished up for the day I had some time to put a banana bread in the oven. There were a couple of dire-looking bananas in the fruit bowl, which normally I chuck straight in the freezer for future use in cakes or smoothies, but I was inspired to whip something up then and there. I looked for a 'healthy' recipe for banana bread, something without as much sugar and fat and found one on BBC Good Food. I didn't quite have the right amounts of everything so I adapted it a bit to suit, and added some extras.

140g flour - wholemeal would make this even healthier, but I didn't have any.
100g self-raising flour
1 teaspoon baking soda
1 teaspoon baking powder
pinch of salt
1/4 teaspoon mixed spice
1/4 teaspoon cinnamon
2-3 ripe bananas, mashed - I think 3 is best, but I only had 2.
4 tablespoons of agave syrup - I only had honey, so I mixed about 3 tablespoons of clover honey with a little hot water, to make it more like a syrup. I used a little less as I didn't want it to be too sweet.
3 large eggs, lightly beaten
150ml of low-fat, plain yoghurt - I didn't quite have 150ml so about 50ml was some mixed berry yoghurt I also had in the fridge.
chopped pecans or walnuts (optional - and I didn't opt for these).

Pre-heat oven to 160 degrees celsius, fan bake. Put all the dry ingredients in a large bowl and line a loaf tin with baking paper - make sure you leave it coming up over the sides a bit. In a second bowl, combine the mashed bananas, agave syrup/honey, beaten eggs and yoghurt. Add to the dry ingredients and mix until just combined. Pour into the tin and sprinkle the nuts on top, if you're using them. Bake for 1 hour 10-15 minutes, until a skewer comes out clean - mine was done in just over an hour though so keep an eye on it. Cool on a wire rack and eat warm, or like the Aussies do, slice it, toast it and spread it with butter, cream cheese or even lemon curd at breakfast time. Store in an airtight container and it should last at least a few days, longer if you're toasting it.


I was a bit over the usual for breakfast and this was a bit of at treat for the rest of the week but it didn't taste overly sweet and a couple of slices with butter were surprisingly filling. It wasn't quite as banana-ry as I would've liked, so I'd use 3 bananas next time. I've recently bought an Easiyo yoghurt maker too, which is great as I use a lot of natural yoghurt, both in cooking, smoothies and just to eat, so it's nice to be able to make your own. It's also great served with any sort of sweet cake instead of cream, to take the edge off the sweetness a wee bit. Enjoy!

Sunday, September 13, 2015

Slow Cooker Greek Lamb

As promised (albiet a little while ago), here's something yummy and easy peasy for the slow cooker - and coming into Spring, it's actually pretty perfect. Last weekend, we were pretty lucky to have a beautiful sunny weekend here in Wellington, so it's starting to feel like winter might finally be over. Which also means I probably won't be using my slow cooker quite as much any more, so best to get in a few final meals. I put this on last Sunday morning, before heading out to a baby shower and to visit some other friends, and it was lovely to come home to the house smelling like a good roast - with hardly any effort.

Sometimes I struggle to find interesting things, beyond the standard stews and the like, to make in the slow cooker - if you know any good links, please let me know. This recipe is courtesy of www.kidspot.co.nz, a good website for kid-friendly recipes but also if you're not very experienced in the kitchen. I've found a few good, simple recipes on there - even one or two my partner was willing to have a go at!


3 tablespoons olive oil
1kg rolled lamb loin - I actually used a bone-in roast, because it was about half the price of a rolled and stuffed lamb loin, so this is ok too. Mine was about 1.2kgs.
1kg potatoes
1 bunch rosemary
1 head garlic
1/2 cup dry white wine
1/2 cup lemon juice


Peel and cut the potatoes into eighths. Place these at the bottom of the slow cooker and put 2 sprigs of rosemary on top. Peel 6 cloves of garlic and slice. I had some large home grown bulbs a friend gave me which have a really strong flavour, so I used 4. Poke holes in the skin of the lamb with the point of a knife and push the garlic into the holes. Heat the oil in a pan on the stove and brown the lamb all over. Place the lamb on top of the potatoes in the slow cooker and push sprigs of rosemary into the holes you put the garlic into earlier. I had some leftover sliced garlic so I put that into the slow cooker too. You can also put your squeezed lemons in there as well. Pour over the wine and lemon juice and cook on low for 6 hours or high for 3 hours - a little less if you like your meat rarer.


The meat was lovely and tender and the potatoes were really soft. I took them out of the slow cooker and fried them, to make them a wee bit crispy.I didn't need to use any extra oil either, as they had some of the fat from the meat on them. Be warned though - the potatoes can have a little bit of a tart flavour from the lemon and wine, which didn't bother me but my partner thought the flavour was a bit too strong. If you didn't want to fry them, you could always roughly mash them with some feta cheese, fresh parsley and cracked pepper. I served the lamb with mint sauce but there was leftover liquid in the bottom of the slow cooker that could've made a nice gravy if I hadn't been feeling so lazy (or hungry). And there's always leftovers for sandwiches - which I'm sure everyone agrees is pretty much the best part about a Sunday roast.

Friday, May 29, 2015

One-cup Pancakes

It was Mother's Day recently and instead of a pressie, I thought I'd invite Mum over to have brunch with me and just hang out. I offered her a 'menu' a few days before, with several choices, and she chose pancakes. Now I know this isn't a super fancy thing to make, and most people can probably pretty easily whip up pancakes, but this one is uber easy - and you probably have everything in your cupboard already. This recipe is another Jamie Oliver one, but I chose it because it's the simplest of simple recipes. It was a lovely sunny day, so making these in my kitchen on a Sunday morning for my mum was really nice.

1 large free-range egg (I used 2 smaller ones)
1 cup of self-raising flour
1 cup of milk
sea salt
1 tablespoon of oil

And whatever you want to put on your pancakes! I chose:
1/2 cup of frozen mixed berries
6 tablespoons of plain yoghurt
2 teaspoons of runny honey
1 teaspoon cinnamon

Crack the egg(s) into a large mixing bowl. Add in the flour, milk and a pinch of sea salt. Whisk it all together until it's a nice smooth batter. If you wanted to put anything in the pancakes, like blueberries, you would fold these in at this point. Put a large frying pan on a medium heat and add half the oil to the pan. Make sure the oil covers the whole pan - I usually use a pastry brush or a paper towel. Add large spoonfuls of the batter to the pan, with space between each pancake to allow them room to spread out. Cook them for 1-2 minutes or until bubbles appear on the surface, and then flip them over for another couple of minutes on the other side. You need to cook them in batches, so once they are cooked, I put them on a plate in the oven on a low heat so they keep warm. Use the rest of the oil between batches if you need to.

For the accompaniments, I put the frozen berries in the microwave for about 20 seconds and then blitzed them a little with a hand blender, but not so much that they were completely puréed and smooth. I divided the pancakes between two plates, in piles, and topped with the plain yoghurt, berry sauce, drizzled the honey over and sprinkled a little cinnamon on the top.

We washed our pancakes down with some mimosas (a fancy way of saying bubbly with orange juice), even though I was a little hungover. It was a really nice way to treat my mum, but with something homemade we could enjoy together.. I'm lucky that I live in the same city as my mum, so I see her fairly regularly, but that hasn't always been the case - I spent the better part of nine years living overseas and despite the fact that I've been living back home for over two years now, she still tells me how happy she is to be able to spend time with me. I am sure everyone says this about their mum, but mine is pretty special, so it was a pleasure to make these, and enjoy them with her. Love you Mum!


Friday, May 15, 2015

Tomato and Chilli Chutney

I had quite a few green chillis on my plant in the garden recently and I was really hoping they would ripen at the same time so I could make some chilli chutney or relish. But they didn't - they ripened frustratingly slowly, one by one. Not helped by our cat pulling a couple off the plant before they were ready, bringing them inside and giving them a good chew. I did however pay a visit to my aunt in Martinborough - who supplied the olive oil used for the pesto a few weeks back - and she gave me an abundance of chillis from her garden. Back on track.

I love a good chutney, especially with cheese and crackers or in sandwiches, and this recipe was so easy. It was from BBC Good Food, which is another of my go-to websites. It was submitted by a reader, so I was a tiny bit sceptical, but it had some positive comments and seemed super easy so I thought I'd give it a go. I made a half batch, because I don't have a really big pot at the moment, so that's the quantities I've listed below. It made one and a half medium jars and one small jar, which was plenty for just two of us. Just double everything if you want more.

Tomato and Chilli Chutney

250g red onion, roughly chopped
500g tomatoes, roughly chopped
3 garlic cloves -  4 if you're doubling this recipe - roughly chopped or crushed
4-6 chillis, roughly chopped - I used 4 and it's a bit on the spicy side, so I'd recommend less if you don't like it too spicy, or removing the seeds
A thumb-sized piece of ginger, peeled and chopped
125g brown sugar
75ml red wine vinegar
5 cardamom seeds - I had ground cardamom in my pantry, so I used about 1/4 teaspoon of that instead
1/4 tablespoon of paprika - add a little more if you like the smoky flavour, like I do

Put all your ingredients into a pot and bring to a gentle simmer, stirring occasionally. If you're making a half recipe, like I did, you might need to add a splash of water as well - but not too much as the tomatoes have a lot of water in them. Simmer on a low heat for one hour, without a lid on. Use a hand blender to blend the ingredients, but just a little as you don't want to purée it - it should still be chunky. Bring it to a gentle boil again, and boil until it looks shiny, thick and sticky. This should only take a few minutes. Spoon into sterilized jars. I had no idea how to sterilize jars because this is the first time I've made anything that goes in jars, so I just boiled some water in a pot and put the jars in for a few minutes and took them out with tongs. Turns out the same website this recipe is from, has some handy instructions here if you need them though. Refrigerate in the jars overnight. The recipe says it will keep for 6 weeks.

Nice and spicy and sticky and excellent with cheese. I'll definitely make this again now I know it's good - and I'd make the full recipe as a few extra jars would make great gifts. I even made some cute labels, and gave the small jar to our upstairs neighbours.


Monday, May 4, 2015

Chocolate Brownie

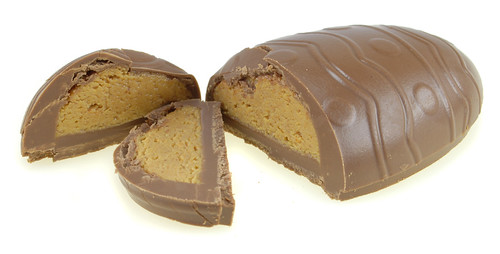
Some friends moved into a new place not too far from where we live, invited us over for dinner and we were on dessert. I just happened to have most of a leftover Reese's Peanut Butter Egg hanging around the house post Easter, that looked a little something like this:

www.candyblog.net

Drool. I love the combination of peanut butter and chocolate - so sweet, but so salty - but this egg was a little full on, like American-candy full on. So rather than giving myself one hell of a serious sugar high, I thought this would be great in brownie. Because this egg is so intense and sweet, I was looking for a slightly healthier recipe, but one that would still be fudgy. Hello www.healthyfood.co.nz!

Chocolate Brownie

1 cup unsweetened apple puree or sauce
1/3 cup cocoa powder
3/4 cup self-raising flour
1/2 teaspoon baking soda
1/2 cup sugar
1/2 teaspoon of salt
1/2 cup dark chocolate chips
3/4 cup (70g) walnuts (optional)

Now before you start getting any kind of healthy idea from this, remember I said healthier. The apple puree I used was sweetened, so I used a little less sugar, as I didn't want the brownie to be overly sweet. Aaaaand instead of using nuts, I just used the chopped up Reese's egg - which made about a cup total.

Preheat the oven to 175 degrees celsius. I used regular bake, not fan bake, as I wanted the brownie to cook slowly so it would stay fudgy and not dry out. Lightly oil a 20cm x 20cm baking dish. I used an enamel dish that was about 20 x 15, and 5 cm deep as I planned on cutting it into more bite size pieces, rather then squares. 

Put the apple puree in a bowl and sift in the cocoa, flour and baking soda. Add the sugar and salt and mix until just combined - over mixing will toughen the brownie. Gently fold in the chocolate chips and nuts (or the excess amounts of chopped up Easter egg) and transfer to your baking dish. Bake for 25-30 minutes until the centre is still fudgy when you stick a skewer in it. As mine was in a deeper pan, 30 minutes was about right. Let's just say 'fudgy' one more time.

You're meant to cool the brownie in the dish for 5-10 minutes before turning it out and then slice it when it's cold, but I made these not long before we had to leave so I just cut them into small pieces in the pan, and put them into a plastic container. Dust them with icing sugar, or serve them with cream or yoghurt. I usually prefer the tartness of yoghurt with something sweet like this, but surprisingly, this wasn't as sickly sweet as I thought it would be and the chunks of the peanut butter centre from the egg were just amazingly good. Small pieces were definitely a good call though! I'm totally sold on using apple puree in brownies now - it results in a really nice (all together now) fudgyness and help it to not be overly rich in sweetness.  

If I made this again, I'd probably still omit the nuts (just because I don't want nuts taking up any room chocolate could be taking up), and cut up some Whittakers chocolate, rather than using chocolate chips. I consider myself a bit of a brownie connoisseur- in the eating rather than the making - and it's hard to get that soft chewy texture, with the crunch of chocolate chunks and the crispy top, but this is a pretty good go to recipe. 


Sunday, April 26, 2015

Basil Pesto

I was recently in the enviable position - and fairly uncommon for an amateur city gardener, in my experience - of having a fairly bushy basil plant that was starting to go to seed. Basil needs a really sunny spot - and fortunately my wee garden bed gets lots of it - but only a few months ago, my basil was a forlorn little thing and had mostly been eaten up by bugs. I was on the verge of pulling it out and planting another one when suddenly it rescued itself and took off! Miracle basil! And of course when I thought about what I could do with all my basil, I immediately thought pesto. This is a super easy recipe by the free range cook herself, Annabel Langbein. Her recipe apparently makes a lot more than I ended up with but by the time I got all the basil leaves off my plant, I didn't have quite as much as I'd originally thought.

Basil Pesto

2 packed cups basil leaves - I had 1 cup
2 large garlic cloves, crushed
3/4 cup good quality olive oil - I used about 1/4 cup
1/4 cup grated parmesan
1/2 teaspoon of salt
ground black pepper
1/4 cup toasted pine nuts of walnuts (optional) - I used a mix of toasted pine nuts and cashew nuts


This recipe is so simple as all you really need to do is whizz it all up in the food processor.
I used a mix of cashew and pine nuts because pine nuts are pretty expensive and cashews have just as nice a flavour. I toasted them lightly in a dry pan first. Even though I had half the amount of basil leaves, I still used the same amount of everything else, but only 1/4 cup of olive oil. I put everything except the olive oil into the food processor, blitzed it, and the added a bit of olive oil at a time while I blended it a bit slower until I was happy with the consistency - I prefer a little less oil, but you might like a bit more. Good quality olive oil is very important, to get a really nice flavour. My aunt and her partner live in Martinborough and grow their own olives which they press at the village press and I was lucky enough to be given a bottle last Christmas, so I used that.


You can store the pesto in the fridge for two weeks, or freeze it in small containers, according to Annabel. Mine only made one small container though, so I ate it over the next week on crackers, on toast, and stirred through spaghetti with some lightly friend broccoli, kale, spinach, chilli and lemon. Yum!

Saturday, April 18, 2015

Huevos Rancheros

We invited my parents came over for brunch over the Easter weekend. They wanted to come visit mostly because they wanted to check out the new-ish couch we got and see our kitten, who's fast becoming a cat....oh and us. I wanted to make something for brunch, that would be filling, but wouldn't mean I had to spend too much time in the kitchen while they were here. I also had a beautiful red chilli that was ripe and ready to be picked from my garden, so huevos rancheros was where it was at.


This recipe is a Jamie Oliver one. I am a bit on-the-fence about the purveyor of pukka tukka. Some of his recipes are great and I use them over and over, others are too involved (30 minutes my arse) or have too many ingredients, some of which can be hard to find. I do have a good vegetarian rogan josh recipe of his that I've used millions of times that I'll blog about at some point. Anyway - this recipe falls into the good category - nice and simple and not a single crazy ingredient.

Huevos Rancheros - or as Jamie likes to call it Mexican Breakfast (how British)

olive oil
1 onion, peeled and finely sliced
2 cloves of garlic, peeled and finely sliced
2 red peppers, deseeded and finely sliced
2 fresh red or orange chillis, deseeded and finely sliced
1 large dried chilli
3 fresh bay leaves
sea salt and freshly ground black pepper
2 x 400g tins of chopped tomatoes
2 large tomatoes, sliced
6 large eggs
6 tortillas
150g cheddar cheese, to serve

My mum is not a big fan of really spicy food, so I only used one fresh chilli and instead of a large dried chilli, I used some dried chilli flakes. I also used dried bay leaves, and instead of tortillas, I served it with some fresh, sliced bread that I drizzled with olive oil and put under the grill for a couple of minutes each side. I don't think this recipe would really serve 6 people if you followed it to the letter - I used 1 and 3/4 tins of tomatoes, 3/4 of one red pepper and 4 eggs and it served 4 of us, but with no leftovers. I think you'd need another half tin of tomatoes at least to stretch it to 6 people, unless you weren't very hungry.

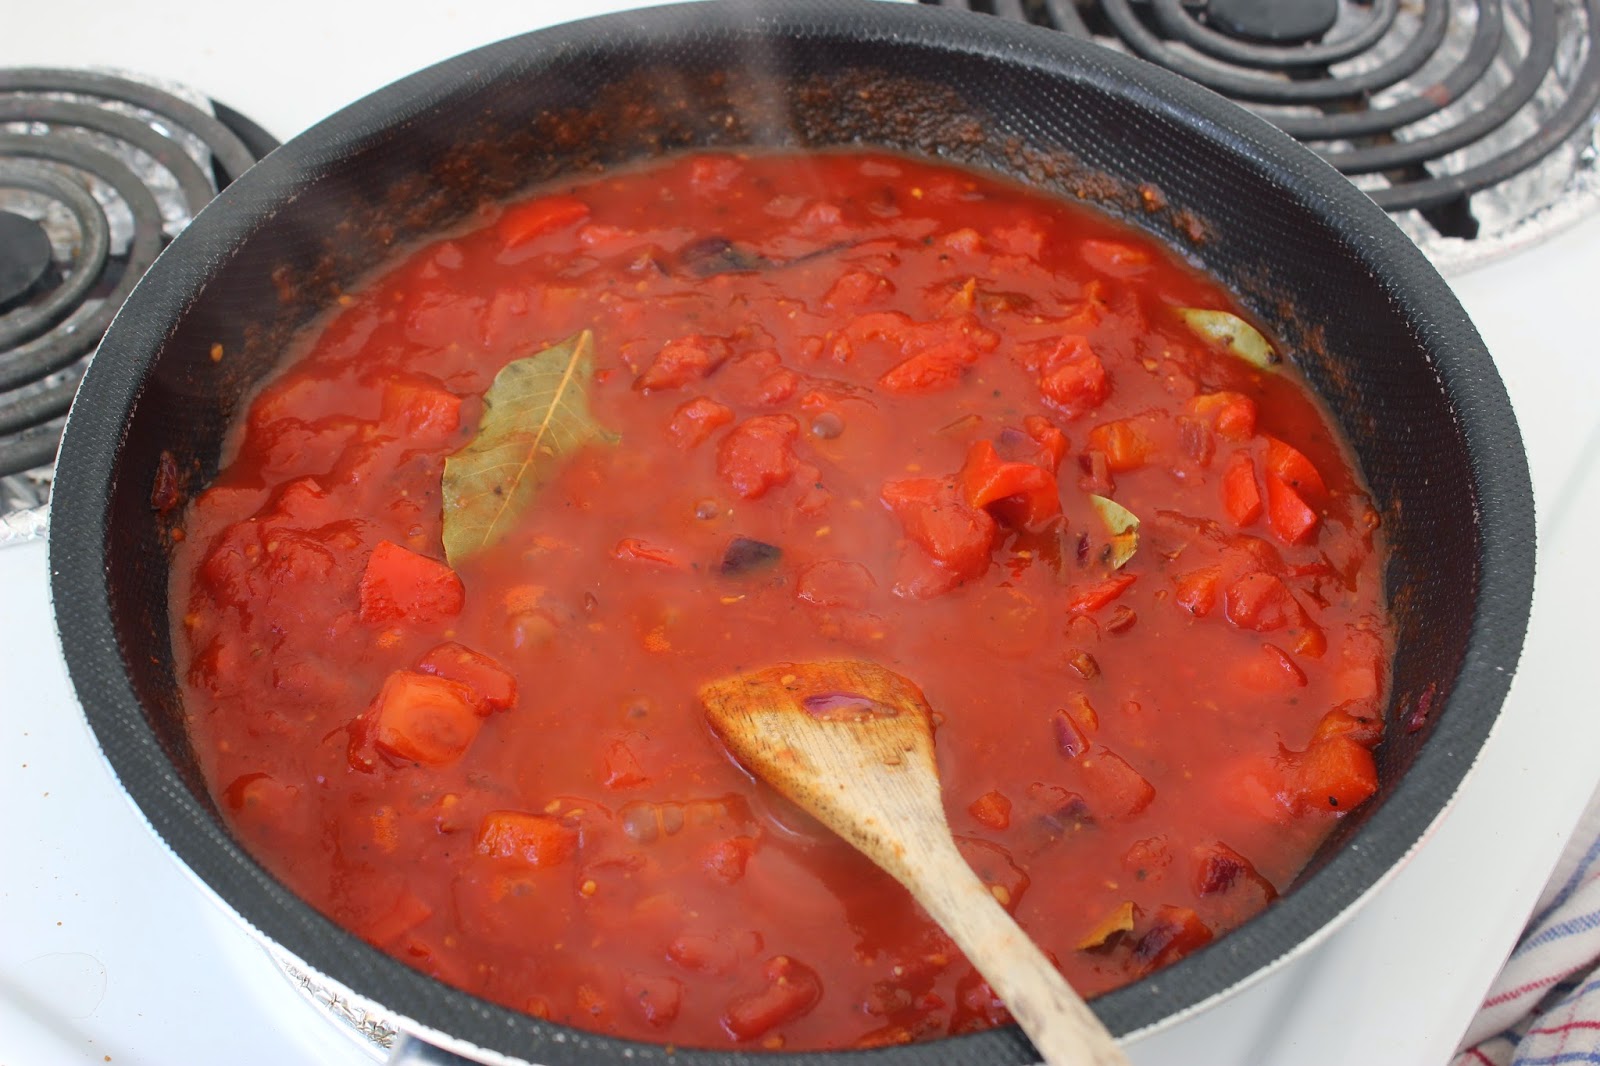
I started by doing the sauce before the parentals arrived, so all I had to do was add the eggs and grill the bread when they got here. Heat the oil on a high heat, add the onion, garlic, peppers, fresh and dried chillis, bay leaves and salt and pepper. Stir and cook for 15 minutes to soften and caramelize everything. I turned the heat down to medium and stirred it pretty consistently so it didn't burn or stick. Add the tinned tomatoes and break them up a bit if necessary. Bring to the boil and turn down to a medium heat and cook it until it begins to reduce down to a thick stew-like consistency. Add more salt and pepper if you need to. I took it off the heat at this point and waited for the 'rents to arrive. When we were ready to eat, I sliced one tomato (because I don't really like fresh tomato, ok) on the top and made wells in the tomato stew and cracked the eggs in. Season from a height (not too sure what the height adds to it), put the lid on and let the eggs poach for about 3-4 minutes - you should be able to see when they're set, or just give them a poke. Grill the bread or warm the tortillas while the eggs are cooking. I sprinkled some fresh parsley from my garden onto the top, took the frying pan right to the table and served the grated cheese and bread on the side so everyone could do their own.

Sometimes when I make this I also add beans (cannellini beans are my favourites), to make it a bit more substantial. Next time I'll add some chopped up chorizo when I'm cooking the onion and red pepper at the beginning - the garlicy, spiciness would go really well in this dish I think,


Monday, February 23, 2015

Smokey BBQ Pulled Pork

Woo hoo, my very first recipe blog. And what better way to start than with MEAT!

Why did I make it? I made pulled pork a while back in the slow cooker, and it turned out...ok. It wasn't quite as flavoursome as I'd hoped, but that was probably because it was a 'healthy' recipe. I also had everything I needed to make it from this recipe, except the bbq sauce and pork (so yeah, the main ingredients). Also, pulled pork is just awesome and this recipe is nice and simple.
Where did this recipe come from? From one of those free recipe cards you get at the supermarket - so housewifey
What's it good for? Feeding lots of people or just at the weekend when you've got some time to wait for dinner to cook.
How many people can eat it? This recipe made 6 serves (a dinner and two lunches for two people)
What do I serve it with? I made a coleslaw with red and green cabbage, spring onions, coriander (super quick in the food processor) and chipotle aioli, and put it into some nice fresh bread rolls.


What do I need?

3/4 cup BBQ sauce. I used Wattie's Bit on the Side Smokey BBQ sauce because the people who wrote the recipe card get paid to put that in the recipe I guess, but I reckon you could use any sauce, but in my opinion, make sure it's a smokey one
1/4 cup cider vinegar
1 tbsp worcestershire sauce
1 tsp mustard. I used wholegrain
1 tsp dried thyme. I used fresh as I had some in my garden
1.2 kg boneless pork shoulder, rind removed and fat trimmed. y piece was just over 2 kgs and it had a bone, but it was all good - I just adjusted the cooking time.
1 onion chopped (I used a red onion, just because I pretty much always do.
4 cloves of garlic crushed. I used already-crushed-in-a-jar garlic because my garlic disintegrated into a cloud of dust when I went to crush it.

How do I make it?

Preheat the oven to 160 degrees celsius. Mix the bbq sauce, cider vinegar, worcestershire sauce, mustard and thyme in a bowl. Put the onion, garlic and pork in a casserole dish. Pour over the sauce, cover and out in the over for 2 1/2 hours or until the pork is really tender. I cooked it for 3 hours, as it was a bit bigger and had a bone in it. I turned the pork once half way through cooking and poured some of the sauce back over it.

Once cooked, take it out and shred it with two forks. Put it back in the casserole dish with the sauce and stir it up. Serve it with coleslaw in bread rolls. Nom nom nom!

Tip: If you're making coleslaw, make it as you need it, or make it without the aioli and add that as you need it.